Pages

Showing posts with label handmade. Show all posts

Wednesday, September 21, 2011

New Clips


I got all fancy and made some clip on earrings! 
I've done this flower design before, 
last year around Christmas time 
I made some studs and named them my Clara Earrings
I've been wanting to make some into clips 
because I know a few people who love earrings 
but don't have their ears pierced.

Well, I'm happy to say they actually turned out, 
and they made a great gift for my moms bday!
Clara Earrings, clip style.

Monday, July 11, 2011

Yoyo Hair Clippy

I made these hairclips with my sister, Nan. 
Her little girl and my miss G were born within four days of each other. 
At the same hospital. 
By the same doctor.
Cousin twins!
So, naturally, we have to make matchy things  for them to wear....


Start with a circle of fabric, 
stitch with a needle and thread around the entire edge,
and pull the thread tight
making all the edges come together
creating the Yoyo:


Glue your desired hair fastener on the back:
We used hot glue.


And glue something pretty on the front. 
We used my moms amazing assortment of buttons
and came up with all sorts of cute hair clips.


It's nice to have some of these on hand to give as gifts as well.

Wednesday, June 29, 2011

Leah Shirt take 2


Another one of these shirts to show you. 
See? I told you I was going to make 27 of them...
I just love them!


I made my own biased tape for this one as well.
My only fix, and note to self:
It's almost too tight across the chest/ under the arms.


I think I would give a little more space 
for the sleeves and the bodice.
This little gal needs some space to 
WIGGLE! 
Other than that, we survived.

Friday, June 24, 2011

T is for Toddler T


Here is a toddler shirt 
that I figured out how to make
out of one of my old t-shirts I was going to dump.
I'm a genius.

Here's how I did it:

First I traced one of  miss G's shirts that still fits
but is slightly too short
(story of our lives),
and cut out the front and back pieces
on the side folds of my big shirt.


I made sure to line up the bottom of the new shirt
with the bottom of my big t-shirt, 
so I don't have to finish the bottom again.

The difference between the front and back pieces
that I cut out is that the front neckline is cut down 
slightly lower than the back neckline:


I also cut off some of the collar from my big shirt
so I cold finish the neck on miss G's new shirt


Then I cut some strips of fabric to embellish with.
Who likes a plain white t-shirt? bleh.
Here are all my pieces:


The first part I sewed were the shoulders,
sewing the front piece to the back
with the right sides together.

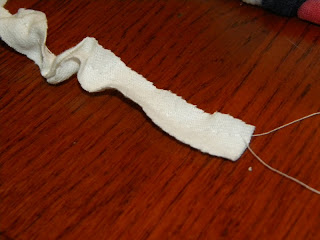
Then I stitched the raw ends 
of the collar piece together, making it a complete circle.

Pinning this new collar onto the right side of the neckline
I stitched it on with the right sides together.


While the front of the shirt is still accessible with my machine,
I stitched (with a long stitch) down the center 
of a couple of my strips of t-shirt material.
Then I pulled on one of the threads so it would gather:


I placed these now gathered ruffle pieces 
on the front of the shirt
and pinned them in place.


Then I simply stitched over them so they would stay.
I did a flower with a stem on this shirt.


Next I put the right sides of the shirt together 
and stitched up the side seams.

Lastly I finished the edge of the sleeves.
I just rolled them for a teeny little hem 
and did a straight stitch,
because I'm creative like that.


And my favorite picture:

Tuesday, May 31, 2011

Special Occasion: Little Purple Dress


This is the cute little dress that I ended up making for miss G for my sisters wedding. All of the nieces in the family were in the same dress, and they were so adorable! Cute little purple girls running around. My sisters picked up the fabric and pattern, and sent it to me to assemble since we are in different states.


I'd have to say that it turned out better than I was imagining... 
I haven't sewn anything silky or satiny. 
The fabric did slide around a bit, but the pattern was easy enough 
it didn't really bother me at all.


My favorite part is the ruffles on the bottom of the dress. They are so sweet.


Friday, April 15, 2011

Envelope Pattern


I needed an envelope to send a 4x6 picture in the mail....
my mad envelope making skills surfaced
and I didn't have to go buy more envelopes


Don't worry, the pattern I am leaving for you 
is way better than the original


You can resize it to your own needs
Print.
Cut.
Fold.
Paste.
Yeehaw. 


Thirty Hand Made Days

Tuesday, March 22, 2011

Knotted Headband & Tutorial


My super cute and stylin' sis told me about a great blog that I haven't come across yet on my own. If any of you are crafters, you will probably love checking out this blog as much as I have! The blogger, Cami, recently put up a post of these amazing headbands that she figured out. Lucky for all of us, she even included A Tutorial


Don't you love this knot? 
The directions in her tutorial were great and easy to follow. 

So easy, 

in fact, 

that I got a little carried away....


Yep.

I actually made tons of these little lovelies in just a couple of days
(nap-time crafting days, that is...)

I didn't follow Cami's tutorial exactly for putting the headbands together, though. 
I didn't want to deal with a big bow of ribbon behind my head to stick through my hair,
So I changed the ribbon ties to an elastic instead. 

Glued the ribbon to one side


Glued on one end of the elastic on the other side

Then glued the ends of the ribbon closed over the elastic,
and repeated on the other end of the headband.


I am loving these!


Thursday, March 17, 2011

Fat Free Granola Tutorial

In a Saucepan, Combine:
1/3 C. Molasses
2/3 C.  Pear Sauce
1/4 C. Honey
1/4 C. Sugar
2 Teaspoons Cinnamon
1/4 Teaspoon Salt
Dash of Nutmeg

Bring to a Boil

In a separate bowl, combine
6 Cups Oatmeal
2 Cups Rice Chex cereal, crushed

Mix all ingredients together

Spread on a baking sheet
Cook at 370 degrees Fahrenheit 
for 15 minutes.
Stir.
Cook for 15 minutes again.
Stir.

Remove and cool.
Add fruits.
Craisins
Golden Raisins
Dried Apricots, diced
Dates
Dried Bleberries

Eat it all up. The end.

Sunday, March 13, 2011

Quick Cards Tutorial


I pulled out my scrap paper the other night to write a couple notes to some of my favorite people. I cut one cute paper in half and turned it over to write my message on the back of it. Just as my pen was about to touch the paper I thought, "What am I doing? That would be super lame to just have a note scrawled across the back of a plain piece of scrap paper!" I pulled out more paper, and my needle and thread, and made some really great cards in no time.

Here is what I came up with:

Cut out the paper, fold the big one in half for the card base

Stitch from front to back, 
leaving the tail long enough to use for a knot

Stitch from back to front, 
leaving a little space between the two stitches
so the paper won't rip

Tie a knot, trim off the excess thread. 

And done- Cute cards instead of lame notes!
I love it when that happens.

LinkWithin

Related Posts Plugin for WordPress, Blogger...